
|
April 15/2000 - Build Update 7 I made some really good progress in the first part of April, which is good as I am going to be out of the shop for 10 days starting this Wednesday. I'm heading back home to Georgetown Ontario to visit my parents and to take a quick trip down to North Carolina to go windsurfing at Cape Hatteras. Should be fun. As, I said, good progress -- lots of stuff working. Approximately 2 months left till Battlebots, and it looks like I'll be finished earlier than the day before I leave (maybe.) - Derek. Suggested Listening During Early April Robot Building: Ween - The Mollusk The Clash - Give 'Em Enough Rope Supersuckers - The Sacrilicious Sounds of the Supersuckers |
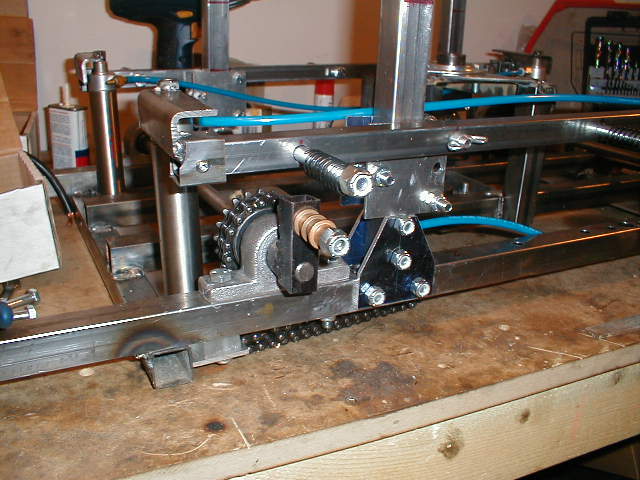
| Mounting the new ground bars to the cylinders. And the best part is it works! The bar goes up and down quite well using the pneumatics. |
|
Some robot builders like to use hose clamps to tie down motors, I like exhaust clamps better though. Here, I've wrapped the Pittman gearhead in a layer of rubber before bolting it down to provide some squishability. 1/2 a muffler clamp welded to the frame, another half on the other side of the motor. Huge 3/8" overkill bolts tighten it all down. HEAVY DUTY! |
|
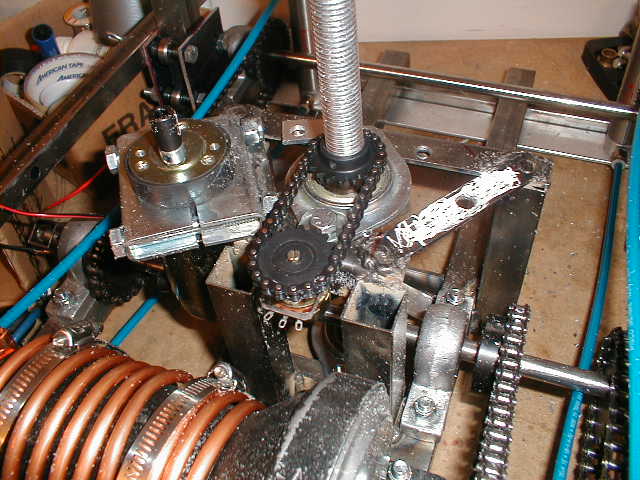
Closing the loop... Here's the feedback pot for the turret. I ended up replacing this mount, but it served its purpose. I find when I make parts out of Lexan, I'll do a couple revisions before I like what I have. Its so easy to cut that there's no worries about throwing out a part to build a new one if it doesn't work out right away. |
|
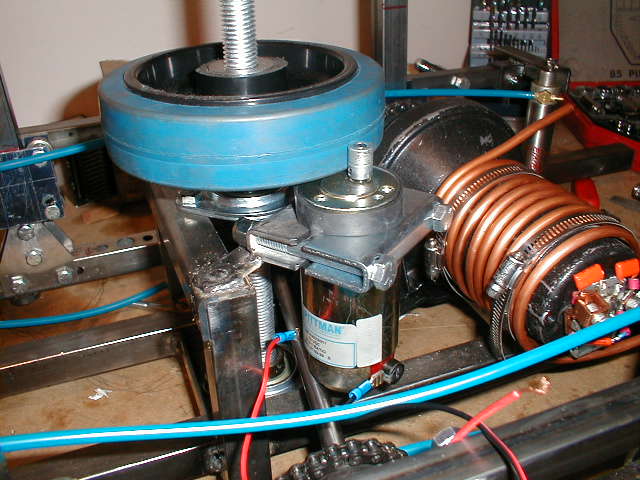
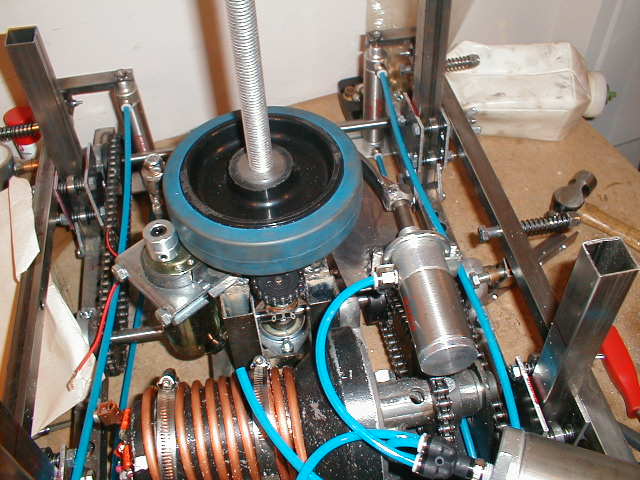
The original friction drive. To get more force against the caster wheel, simply tighten down the motor clamp a turn. My girlfriend though that it turned too slow with a 1/2" drive wheel, so I moved up to a 1" wheel (now a 6:1 ratio ~3 seconds to do 360 degrees). I also talked with MegaDan about his old robot the Alexander and the fate of it's Pittman gearhead motor running a similar setup -- it self destructed the first time the turntable was run into by another robot. This re-enforced my plan to use a friction drive to turn the turret. This way the motor can slip if necessary (hopefully before destroying it's apparently delicate geartrain). |
|
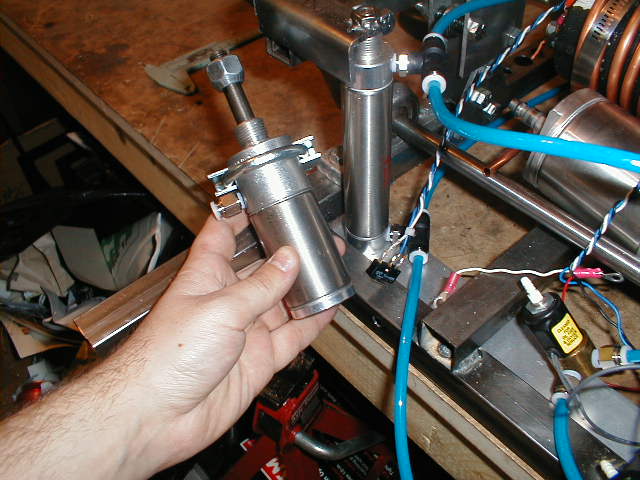
But what about when the turret isn't turning? I want it to be locked into position. This is when I decided I needed to build a braking system. I think this is the coolest thing I've built for Pressure Drop. Here's the master cylinder so to speak. It's pretty fat with a 1 1/2" bore as compared to my other cylinders which are 1 1/16" -- 100% more force output. Single acting too, cos that's all I need. |
|
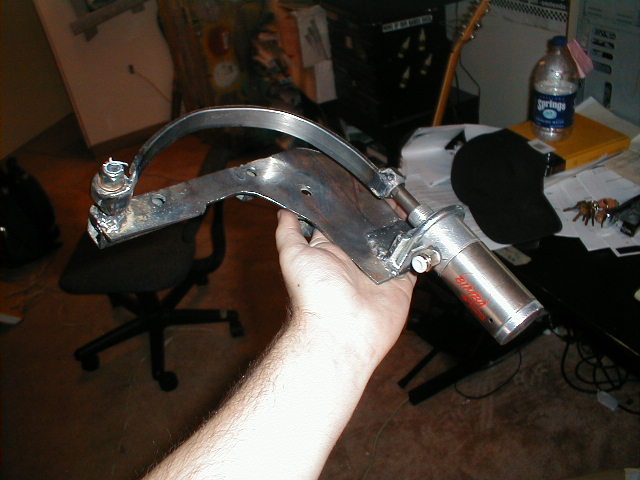
Here's the finished assembly ready to be bolted on to the top of the turret mount. The shoe is made out of a 1/16" piece of steel bent in a U, with a shaft collar welded on the end and a 7/16" fine thread nut (aka a lug nut from a car) on the other end. The base is 1/8" steel plate, and the cylinder's held down with another exhaust clamp. Tight! |
|
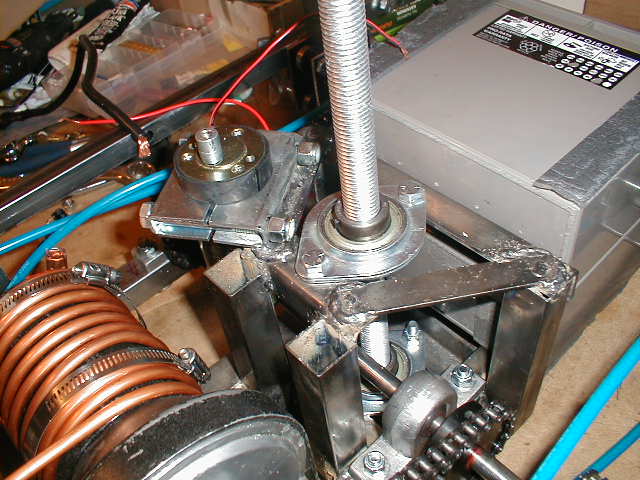
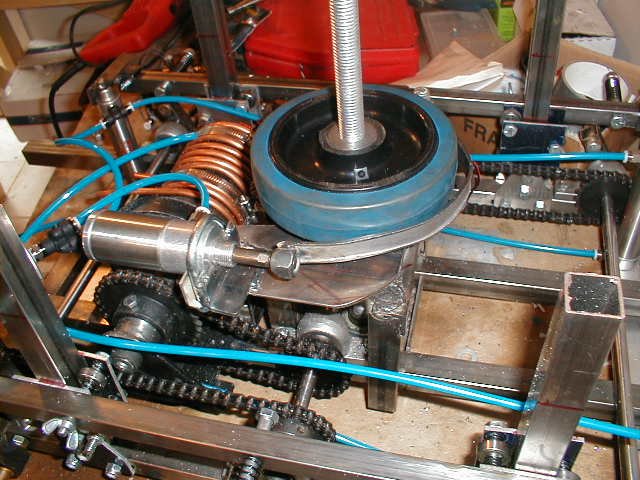
The assembly bolted into place. When the cylinder is activated, it pulls the shoe back against the caster wheel with a bunch (140lbs at 80 PSI) of force, making sure it's not going anywhere. |
|
A shot from the side. The only problem I have had is that the steel plate that is the base, tends to bend up about 1/4" when the cylinder pulls hard on the shoe. It could use some stiffening, but it isn't all together necessary. |
|
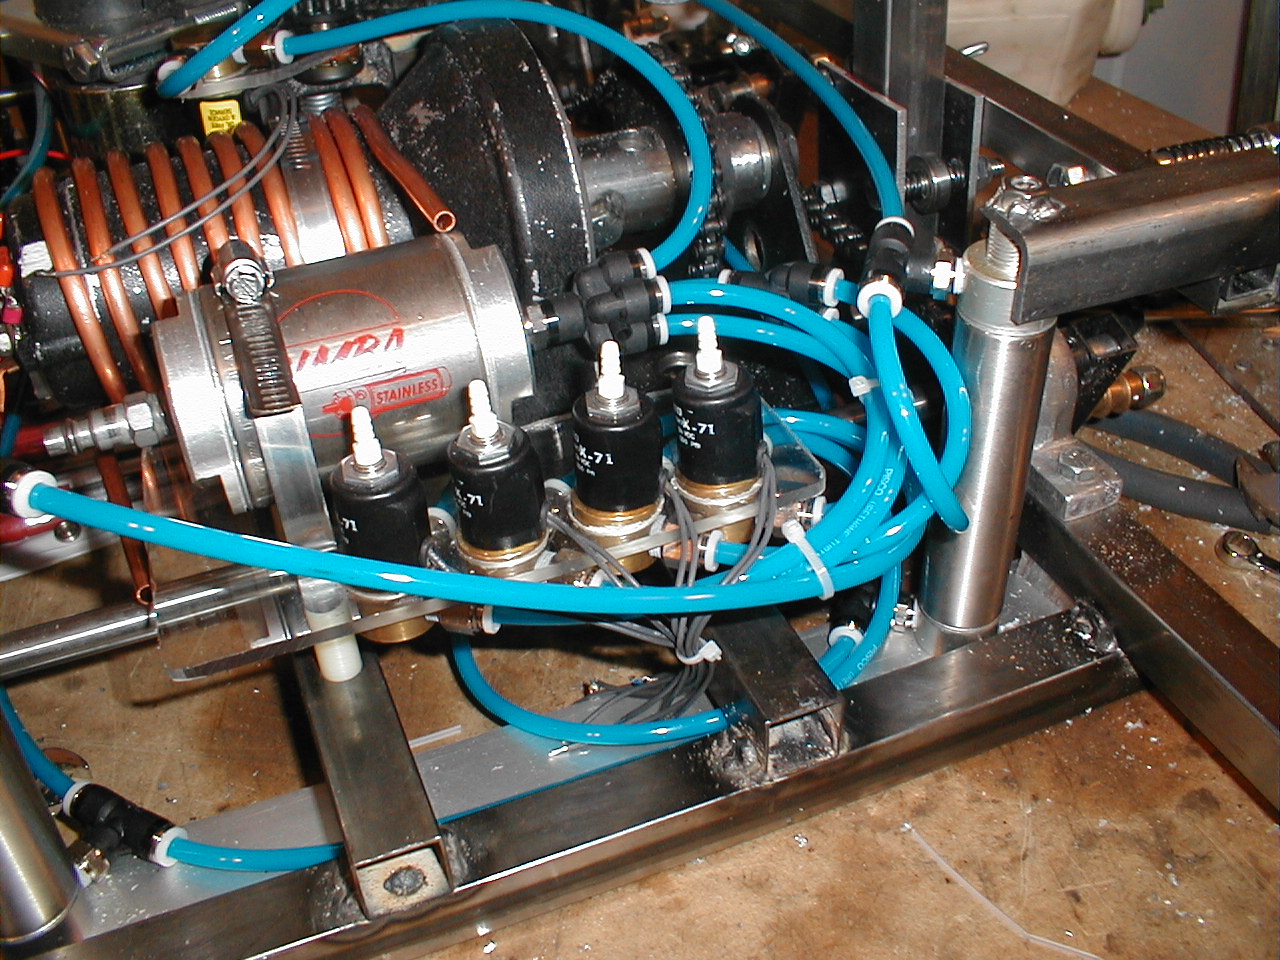
The coolest thing I did aesthetically this month was mounting up the solenoid valves and plumbing the system. I broke down and used a hose clamp to attach the accumulator :) The solenoid you can see in the back left controls the brake cylinder. I kept this photo at high-res, so it might take a bit to download. |
|
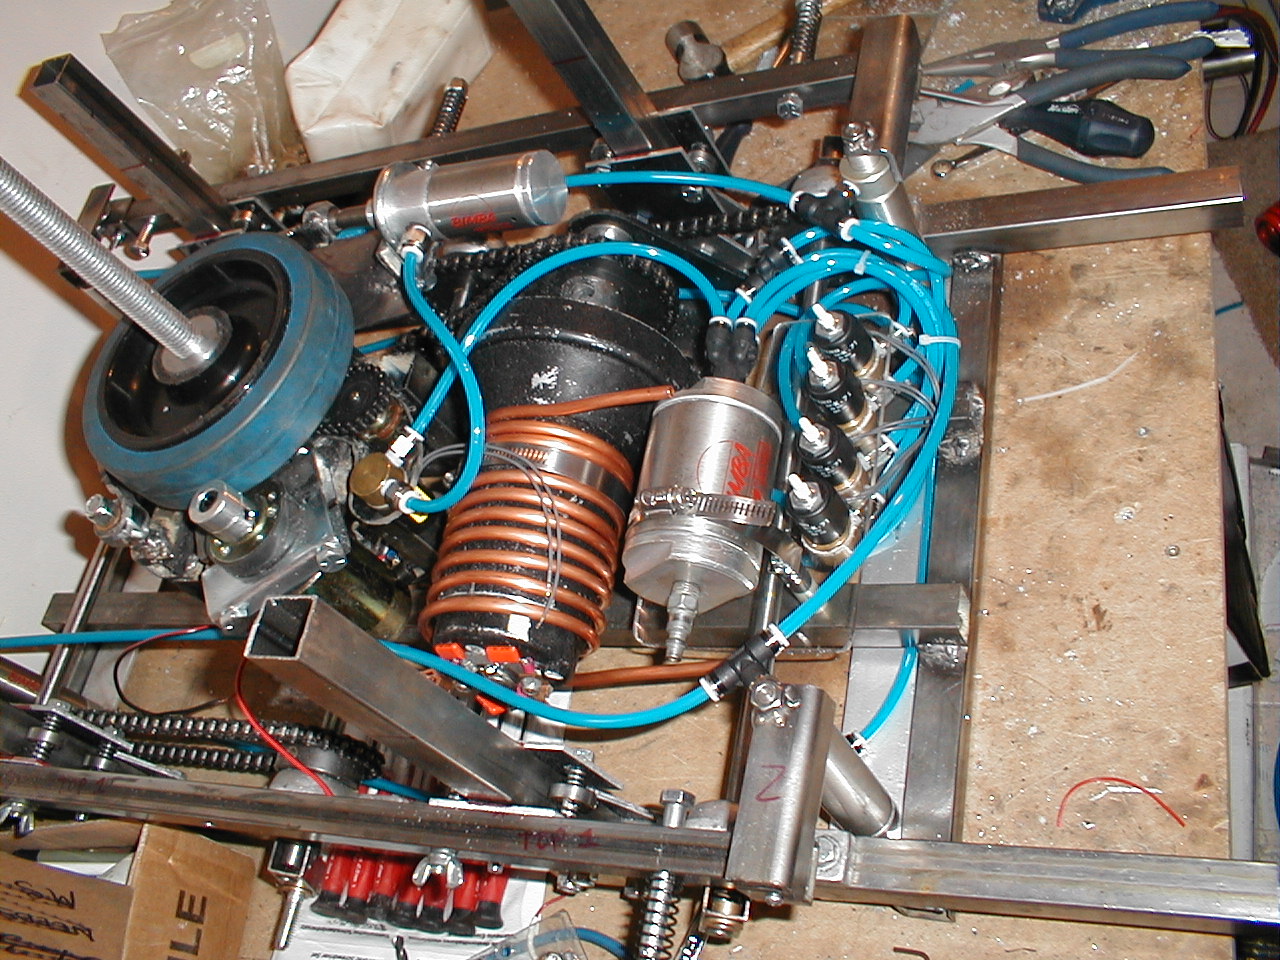
Another high-resolution shot of the current overview of the whole robot. |
|
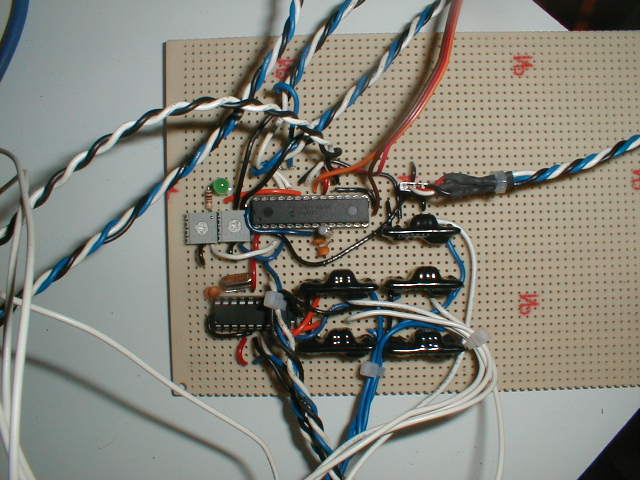
The biggest accomplishment really was building (and programming) the controllers for the turret and the cylinders. On the board is a PIC16F873 and a PIC16F84 which run the turret and the ground bar cylinders respectively. The turret control is especially cool. I use a proportional feedback control system run by the 873 which is commanded by my receiver. It interprets the input signal and sends the appropriate output to my Vantec. When it knows that no movement is taking place it applies the brake. I have to thank Brian Scearce and Dan Danknick for their help with setting up my PIC's A/D. The big black items are some super slick solid state relays to run the solenoid valves. |
|
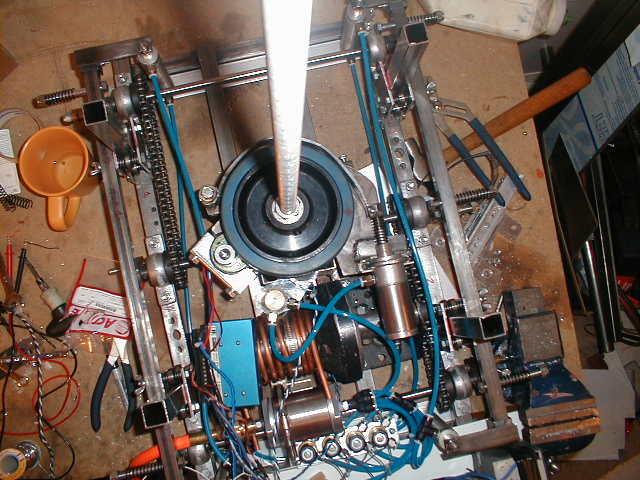
Another full on picture of the robot, from above. I won 6 laser pointer on Ebay for $1.70 each, which I will mount about where the camera is here to provide an array of laser dots on the target robot to help aim the smasher Predator style. |
|
My computer crashed last week in the middle of my heaviest school project week (perfect timing). After reinstalling Win98 I cleaned up all my old directories and files, and I found this little gem. It's an animated .gif I made for the opening splash screen of the Mr Smashy webpage. Dumb stuff, but we all go through those phases. Click on Space Moose to see it. |
|